Top 3 Products & Services
| 1. 2. 3. |
Dated: Dec. 03, 2012
Related Categories
Web HostingPHP Programming
SQL
Linux
This is the first in a line of new tutorials dedicated to Joomla! CMS. In the introductory tutorial we will explain the installation of Joomla! CMS, and later we will go through some basic administrations.This is a tutorial that is meant for the absolute beginners, it is simple and will explain the basics in a few words.
You will need the latest version of Joomla! CMS regardless of where your work will be done, on a local or a remote server. It is important that you always use the latest stable version of Joomla! CMS so that you don't encounter problems. Because Joomla! CMS is an Open Source CMS it is important that you update the latest version of Joomla! CMS on your site as soon as it is released.
STEP 1:
Download Joomla! CMS and make sure you downloaded it from the official website www.joomla.org
STEP 2:
Once you have downloaded Joomla! CMS unpack it in the installation folder. In a live server it is usually a public_html, www or htdocs folder, while in a local server you create a folder inside a root folder (for WAMP - www or XAMPP - htdocs) in which you have to unpack the downloaded installation archive.
STEP 3:
If you have unpacked the archive it is time to begin the installation. In most cases it is necessary for you to create a database that is needed to install Joomla! CMS through cPanel or Plesk depending on the server, while in local you just need to input the database name and it will be created. In creating a database it is important that the MySQL connection collation is always utf8_unicode_ci so that you have a correct database support for your letters. To start the installation on a local server (WAMP, XAMPP...) you just have to type this address in your web browser
http://localhost/name_of_the_folder_where_joomla_cms_is_unpacked
Language choice
In the beginning of Joomla installation you have the option to chose the language of the installation.
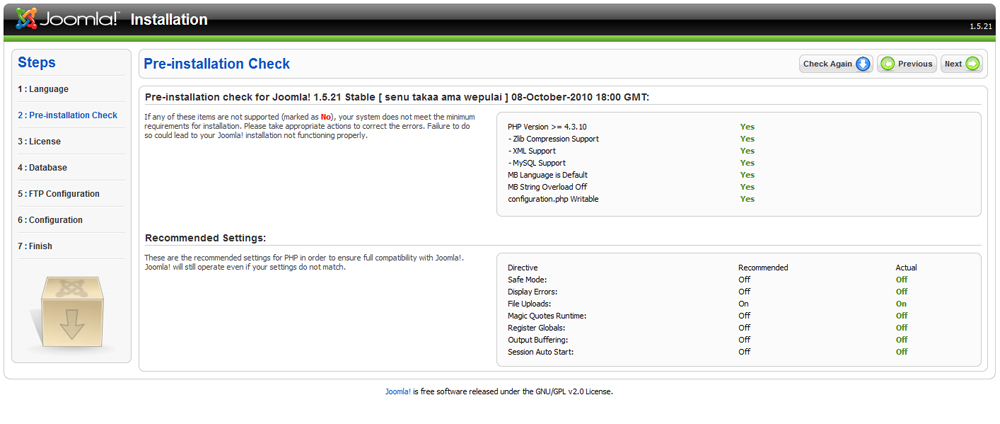
Pre-installation checks
After you have chosen the installation language Joomla will show you the requirements necessary for it to run perfectly. If you are working on a local server all of your settings are in a php.ini where you can change them and adjust the server so it works properly (after you have changed the settings you need to restart the server for them to become active), and if you are working on a live server ask tech support to adjust your server to work properly.
License
After the last step Joomla will show you a license that you should read because it explains what you are allowed to do with Joomla! CMS.
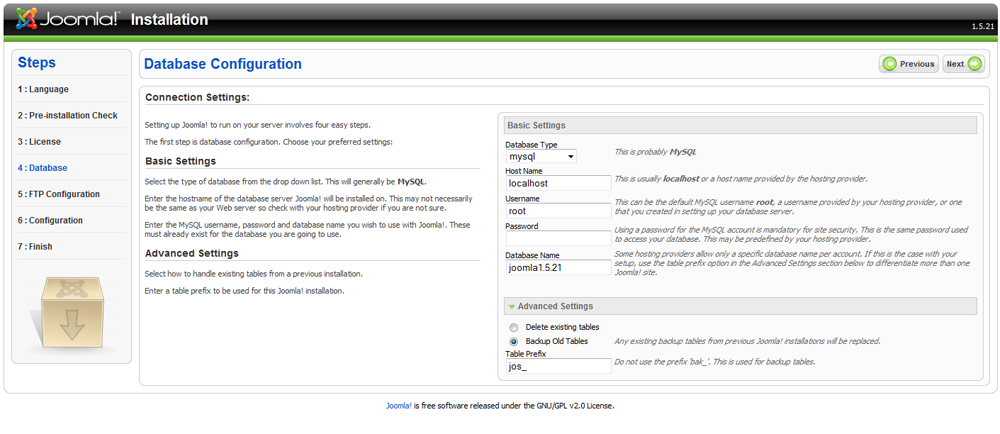
Connecting with the database
In the fourth step you will need to enter the parameters for the database connection. The type of the database, the name of the host (it is usually ''localhost''), the username is "root" because you are working on a local server, and you don't need the password. But if you need a password you can create one through phpMyAdmin. On a live server you will enter your own username, same for the password. In the bottom of the window you will see the advanced settings where you can choose to delete the tables if you are installing in an already existing database or you can make a backup file.
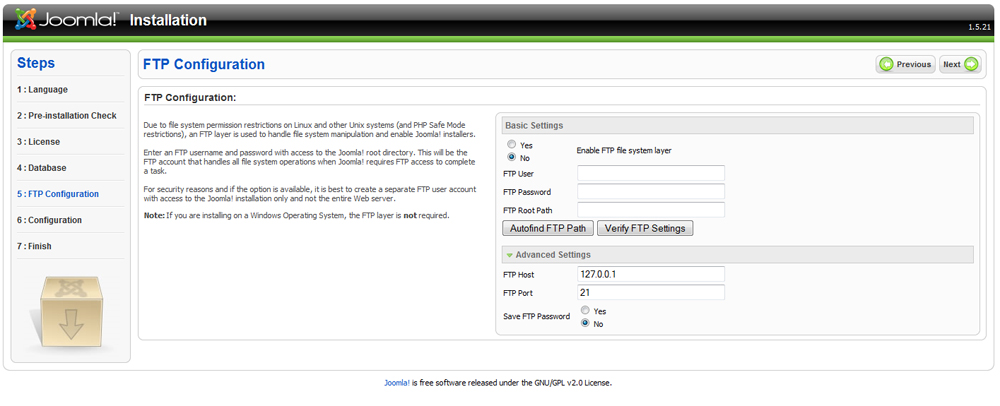
FTP configuration
In the fifth step you have the FTP configurations which you don't have to set up if you are working on a local server. For a live server you can, but you don't have to. You should create a separate FTP account and direct it on the Joomla installation file.
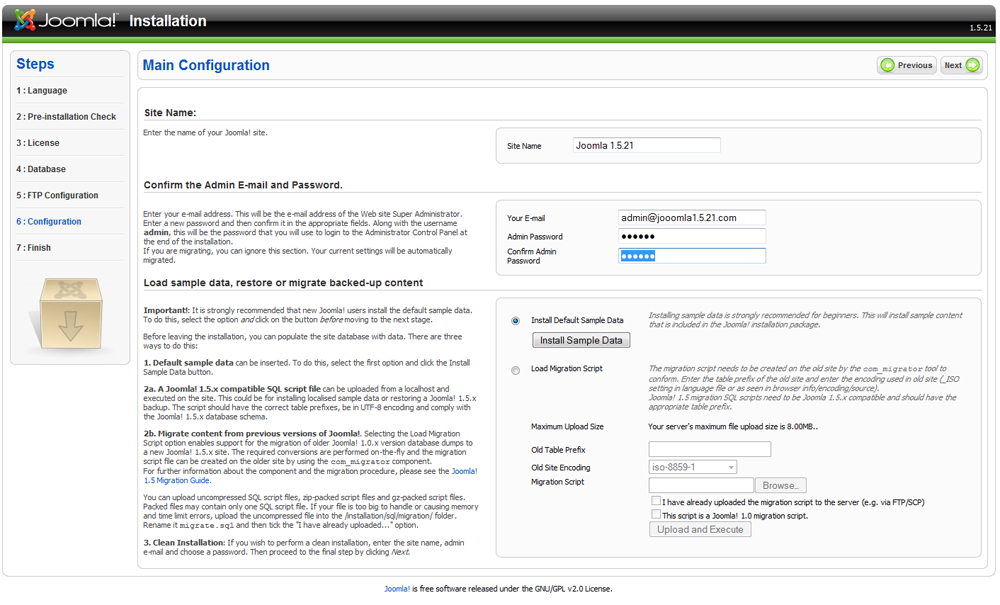
Main Configuration
In this step you enter the parameters that are for the after installation sign up. In the first field you enter the name of the site (you can change it later), in the e-mail field you enter your address, then the password. After entering all of this you have an option to add predefined content on your site (this is recommended for beginners) like where will your texts and site modules be placed.
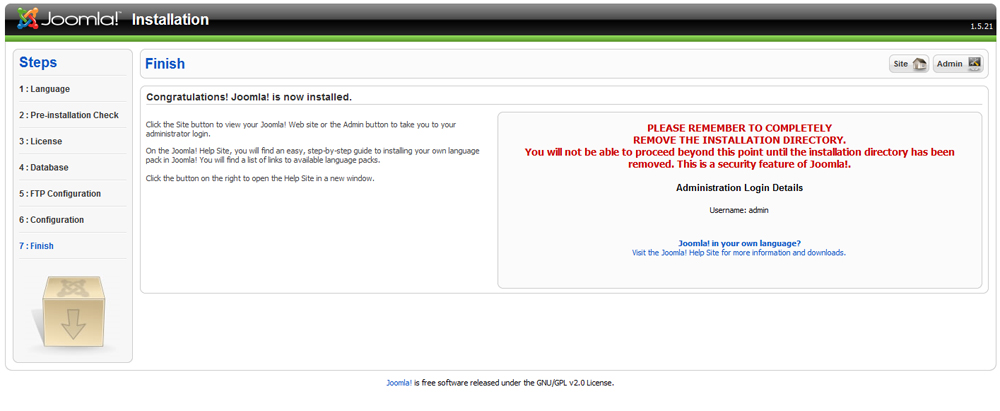
The end
The last step in the installation takes you to this page where it will say to remove the directory 'Installation'. It is enough for you to delete it through the FTP account or using file manager on the web, or if you are working on a local server just delete that directory and then you can access the administrative section.
This was a brief explanation of how to install the Joomla! CMS. See also our other tutorials to make progress in your learning.
Now that you've gotten free know-how on this topic, try to grow your skills even faster with online video training. Then finally, put these skills to the test and make a name for yourself by offering these skills to others by becoming a freelancer. There are literally 2000+ new projects that are posted every single freakin' day, no lie!
 Previous Article |  Next Article |