Top 3 Products & Services
| 1. 2. 3. |
Dated: Aug. 13, 2004
Related Categories
FlashBy Marian Heddesheimer of
The famous "beam me up, Scotty"-effect, is easy to be implemented in Flash 5 (may also work in Flash4).
1. Create a movie clip with a sparkling effect:
If you see the famous effect in the movies or on TV, you recognize a "sparkling" effect, when a person materializes on the platform. This sparkling can easily be implemented using a mask and a little animation.
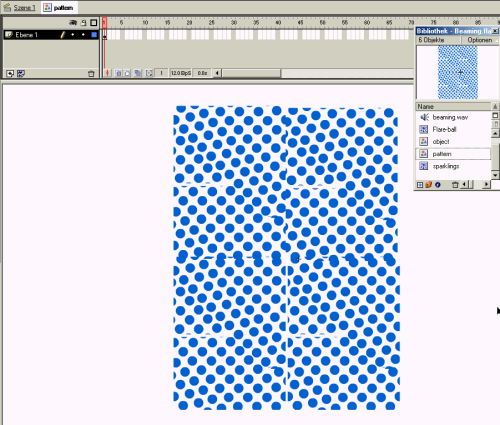
Picture 1: Create a graphic symbol with an irregular dot pattern
As you see in picture 1, you have to create a graphic symbol with a lot of dots on it. Just draw a circle without an outline, and copy it all over the stage. Then create a graphic symbol from that.
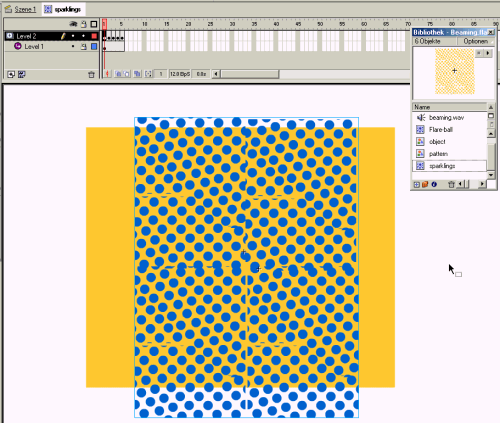
Picture 2: Put this pattern over a yellow background as a mask
To implement a yellow sparkling, you just put the dot-image over a yellow rectangle. Put the rectangle in the first layer, then add a second layer and place the dot image on that. Now change the second layer into a mask. This will make sure you will get yellow dots using the same pattern as the blue dot image.
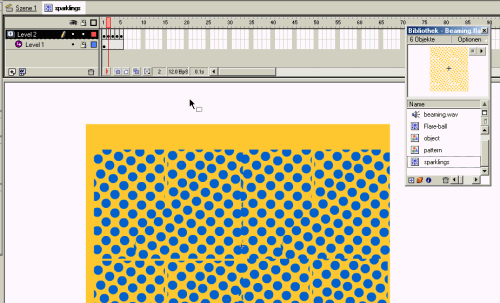
Picture 3: Create several key frames with other/rotated positions of the mask
To animate the "sparkling", just create several key frames on the mask layer, then move and rotate the dot image over the yellow rectangle.
If you place this into a movie clip, you can test the movie clip by using Ctrl-Alt-Enter, or you put the movie clip on the stage and test the film with Ctrl-Enter.
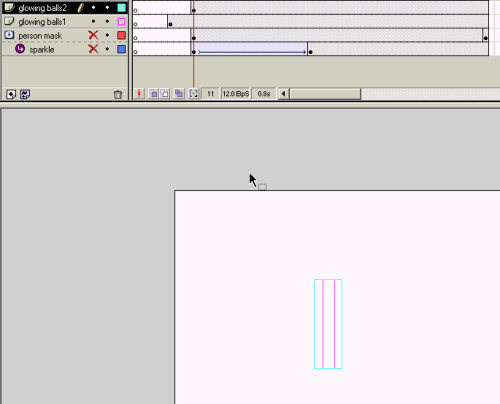
2. Put a mask on the sparkling effect
The sparkling alone is not the desired effect. You have to put a person or an object in front of that sparkling. This object must be faded in or faded out, accordingly if you want to beam-up or beam-down the object.
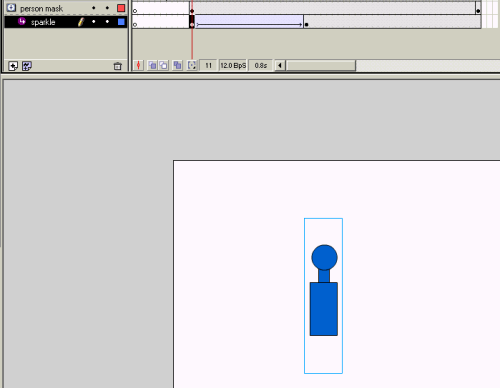
Just putting the object in front of the sparkling would not look nice, thus the sparkling must be limited to the contours of the object. So, you put your object in front of the sparkling in it's own layer, and change that layer to a mask layer. Now, only the sparkling will be shown that is covered by the object's contours.
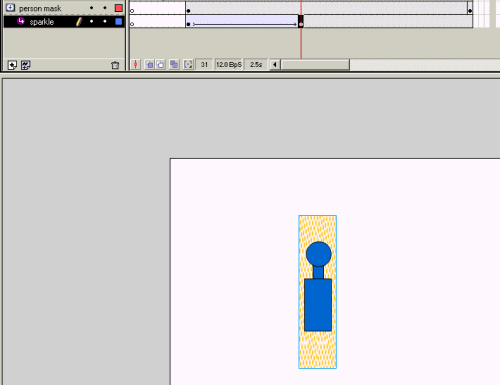
Picture 4: The object to beam as mask in front of the sparkling
3. Fade-in the beaming object above the sparkling
Now it's time to place the real object. If your object is a graphic object or movie clip in the library you can just place the same that you did use for the mask. Hint: Just copy the object from the mask layer into the clipboard, then add a new layer and paste it "in-place", using Ctrl-Alt-V. So you can be sure that the real object is in the same position as the mask object.
Now add another key frame to your "real object layer" and do the fading with motion tween.
If you try the movie now, you should see the object beaming-in or beaming-out.
Picture 5: Create a motion tween for the sparkling from alpha 0% to 100%
The last thing you should do to your sparkling: After the person has beamed-down, the sparkling should fade out and vanish. You can do this, if you just fade out the sparkling movie clip from alpha 100% to 0%.
4. Create a movie clip with "beam balls":
Before a transport starts, there will be these blue shiny lightballs on the platform. You can create them as a movie clip once, and use them in multiple instances to dress up your effect.
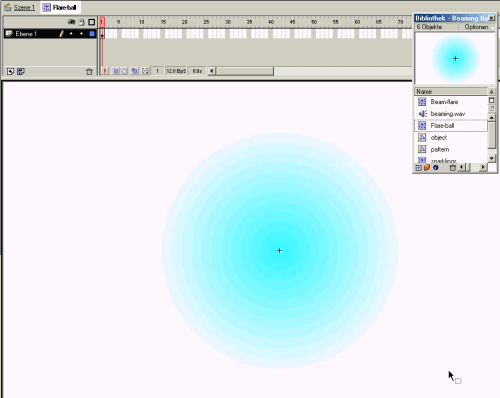
picture 6: Create a single Flare-Ball
The Flare-Ball itself is just a blue circle with a color grade from blue to white.
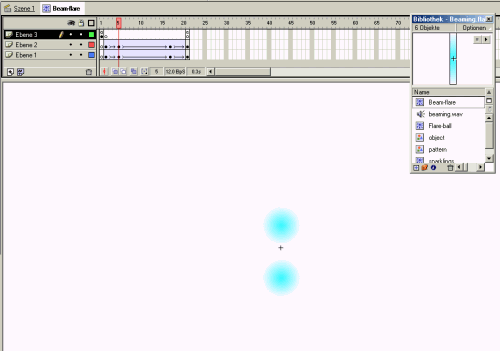
Picture 7: Start with two balls in the middle…
Place the balls in the middle, where the effect starts and use motion tween to move them up and down.
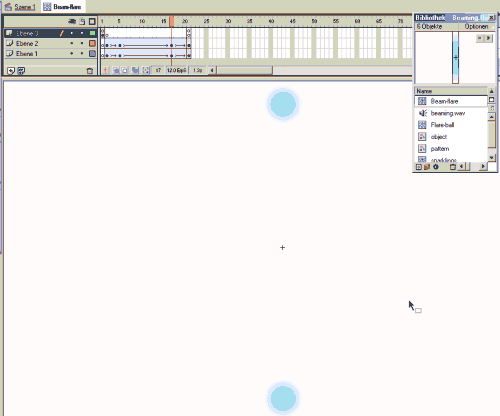
Picture 8: … and motion tween them apart
To avoid abrupt appearing and disappearing of these balls, fade them in and out using an alpha motion tween.
5. Place the "beam balls" before the transporter event
Now you have the shiny balls in an own movie clip, so you can place them before the actual transporting process.
picture 9: Place two of these on the stage in different sizes and on different key frames.
Place two instances of them in separate layers and separate key frames. If you start one instance half a second before the other, you will end up with a perfect effect. I also have scaled the first one to a little greater width, so one set of the balls will be oval, the other set will be circles.
Now just try it out and enjoy.
Now that you've gotten free know-how on this topic, try to grow your skills even faster with online video training. Then finally, put these skills to the test and make a name for yourself by offering these skills to others by becoming a freelancer. There are literally 2000+ new projects that are posted every single freakin' day, no lie!
 Previous Article |  Next Article |