Top 3 Products & Services
| 1. 2. 3. |
Dated: May. 25, 2013
Related Categories
Web HostingHTML
PHP Programming
SQL
In the following two articles we will present to you the full process of WordPress installation.
First of all let us explain what WordPress is and why you should install it.
WordPress is the most popular blogging platform and content managing system (CMS, Content Management System). It is an open source platform that offers a lot to adjust. WordPress is a free platform mostly used by blogger. Basically, it enables you to create Web pages with very little effort and no special knowledge. It is a very powerful tool when it comes to creating Web pages.
Considering that it is an open source platform, all limitations are removed so if you have any knowledge in programing or coding this is certainly the best platform for you. Also, WordPress offers you a huge number of free themes for you blog, and you can also find themes that cost money if you want to have a highly professional blog.
WordPress supports thousands of plugins and gadgets. Plugins are very easily installed and activated. They bring additional things to your blog which makes it more functional and that will help your users. For example, you can add plugins that help commenting, sharing, liking and a lot more. The installation of those plugins takes only one click. You can also simply uninstall them whenever you want.
WordPress is certainly something that is our recommendation because this free open source platform will surely satisfy all your needs.
How to install WordPress on a hosting account?
- Sign into your Account Manager
- Click on Web Hosting
- Click on Launch next to the Hosting account you want to use
- From the Content choose Go Daddy Hosting Connection
- Click on WordPress
- Click on install now (this is shown only when the chosen app is compatible with your hosting account)
- Choose the name of the domain you want to use
- If you don't have a Go Daddy Support profile input the name, agree with the terms and click Next
- Input the description of the database and password and then click Next
- Choose the unused installation directory and click Next. For example, if you want your WordPress page shown when someone goes to nameofyourblog.com/blog, then the blog is the installation directory. If you want you page to show only when someone goes straight to your domain name, then leave this field empty.
- Input the name of the administrator, the password, e-mail and the blog title for your WordPress installation.
- Click Finish
WordPress will be installed on your hosting account in 24 hours with the options you have chosen. Also, you will get an e-mail confirmation.
But, if you have chosen a different hosting provider you should do the following:
Let us assume that you already connected the domain with the hosting as we described, and that you hosting provider uses cPanel. Go to www.nameofyourdomain.com/cPanel
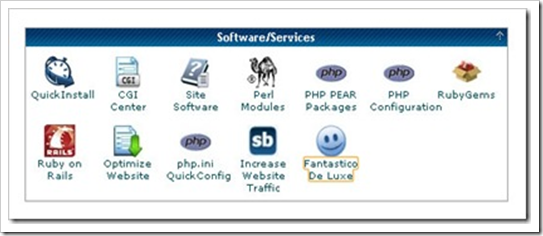
After you have signed in you will see cPanel. Find Software/Services and click Fantastico De Luxe
Tomorrow we will bring the next part of this article.
Now that you've gotten free know-how on this topic, try to grow your skills even faster with online video training. Then finally, put these skills to the test and make a name for yourself by offering these skills to others by becoming a freelancer. There are literally 2000+ new projects that are posted every single freakin' day, no lie!
 Previous Article |  Next Article |